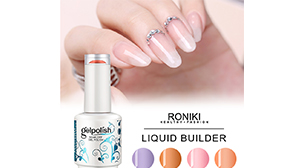
Guide To Doing Nail Art At Home
Going to a nail salon to do a manicure is one of the simple pleasures that many beauty lovers may miss during the epidemic. Although you are unlikely to use nail art often now, as long as you use the right tools and a little practice, you can also create perfect nail art at home. For those who want to learn some new skills during isolation, an expert guide to making nail art is provided.
The manicurist subdivided each step of the process, from the removal of the old gel to nail preparation, polishing, and fixing.
Step 1: Organize your tools
To do nail art at home, you first need to prepare the necessary tools.
For beginners who want to buy a full set of supplies, prepare a starter kit that not only includes all the basics of nail care-primer, topcoat, polishing block, curved file, glue removal tool, hooks tool, cuticle pliers, cuticle remover, Gel remover, and epidermal oil-and LED light for curing gel. Make sure to set your manicure station under the lamp so that you can see all the details of the entire manicure process.
Of course, you also need to choose a gel polish that is compatible with your LED light.
Step 2: Remove the gel
If you have used gel nails, use the most abrasive side of a curved file to remove 80% of the gel. Make sure to be as even as possible.
Then, moisturize your stratum corneum with cuticle oil-this oil can also help you lift the gel faster. Wrap your nails with cotton pads soaked in low-acetone detergent and aluminum foil respectively. Make sure that the nail is tightly wrapped and cover the entire nail with a cotton pad. Let stand for 10-15 minutes with heating equipment.
Remove the aluminum foil and scrape the glue with the blade head of the glue removal tool. (Professional tip: If the gel is not enough to remove easily, we recommend that you further polish the surface of the gel, re-wrap your nails, and then put it back under the heat source.)
Step 3: Prepare your nails
After removing the old gel, take some time to properly prepare the nails.
First, use a cuticle remover. To "double clean" your nails, use the cuticle pusher on the gel removal tool to push the cuticles of your nails back and forth. Then, use the blade head on the glue removal tool to scrape the skin under the epidermis in a circular motion. Wipe off the residual cuticle remover with a cotton pad.
To have a smooth and clean appearance, you need to sand your nails and file them into the shape you like.
Wash your hands with water and soap. If necessary, use cuticle forceps to cut off the excess skin.
Step 4: Use the gel
The last step of nail art gel is also the most exciting step: paint nails with gel polish.
First, apply primer and polish your nails under a lamp to make sure that the nail polish covers the edges. Treat each finger individually for 5 seconds under the LED light. (Note: If you apply primer on many fingers without curing in the middle, the primer will move. If there is no primer around the nail polish, even if it is slight to the eyes, it will affect the retention of the gel. Will affect nail art.)
Once you finish applying and setting the gel, cure-all nails for 30 seconds. Be sure to check under the lamp that the primer covers the entire surface of the nail. If some areas are not covered (near the stratum corneum, the sides, or the top of the nail), we recommend applying a second coat of primer and curing it again.
Apply a thin layer of color and cure for 30 seconds. Repeat the above steps and add 1-2 layers to achieve the opacity you want.
Finally, apply a layer of surface layer, the cure for 3 minutes, and then moisturize with cuticle oil to make your nails shinier!

评论
发表评论